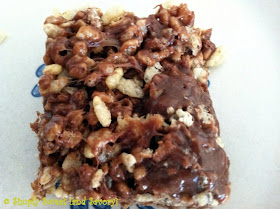
Nutella Rice Krispie Treats
adapted from: chef in training
What You Need
5-6 cups crisped rice cereal
1 10.5-oz. bag marshmallows {Mini or regular should work.}
1/4 cup butter
1 cup Nutella
What To Do
1. Measure cereal into a large bowl and set aside.
2. In a large saucepan, melt butter and marshmallows on medium heat.
Once melted, add Nutella and stir until well-combined.
3. Either pour marshmallow mixture over cereal or pour cereal mixture into saucepan with marshmallow mixture. Stir until well combined and coated evenly.
4. Pour into a 9x13-inch pan. {Use a smaller pan for thicker treats, if desired.} Use a greased piece of waxed paper to help you press the mixture in the pan until even. {The waxed paper keeps sticky messes at bay.}
{As you can see, I had some trouble mixing everything evenly. It was pretty thick and sticky!}
5. Allow to cool and set.Nutella Rice Krispy Treats
adapted from: chef in training
What You Need
5-6 cups crisped rice cereal
1 10.5-oz. bag marshmallows {Mini or regular should work.}
1/4 cup butter
1 cup Nutella
What To Do
1. Measure cereal into a large bowl and set aside.
2. In a large saucepan, melt butter and marshmallows on medium heat. Once melted, add Nutella and stir until well-combined.
3. Either pour marshmallow mixture over cereal or pour cereal mixture into saucepan with marshmallow mixture. Stir until well combined and coated evenly.
4. Pour into a 9x13-inch pan. {Use a smaller pan for thicker treats, if desired.} Use a greased piece of waxed paper to help you press the mixture in the pan until even. {The waxed paper keeps sticky messes at bay.}
5. Allow to cool and set.


No comments:
Post a Comment